HTTP-Live-Capture
Basic requirement
To make HTTP Live Capture, you need to at least do the following steps:
- Enable App Routing in the Home
- Add Default Route and Dns Fallback route in the Routes, make its action to DIRECT, this will make the MintFlow VPN only send traffic to your local Internet without any VPN servers needed
- Enable HTTP Processing in the Tool/HTTP Engine
- Generate a root CA in the Tool/Http Engine/MITM Certficate, install and trust it in the OS, this will allow the App to capture and decrypt HTTPS traffic.
- Add Interested Domains in the Tool/HTTP Process Domain List
- Start the VPN and do live capture
Here are detail steps and with snapshots to guide you to do the task, all the snapshot is done in a iPhone6s plus device with iOS 15 installed.
Config Steps
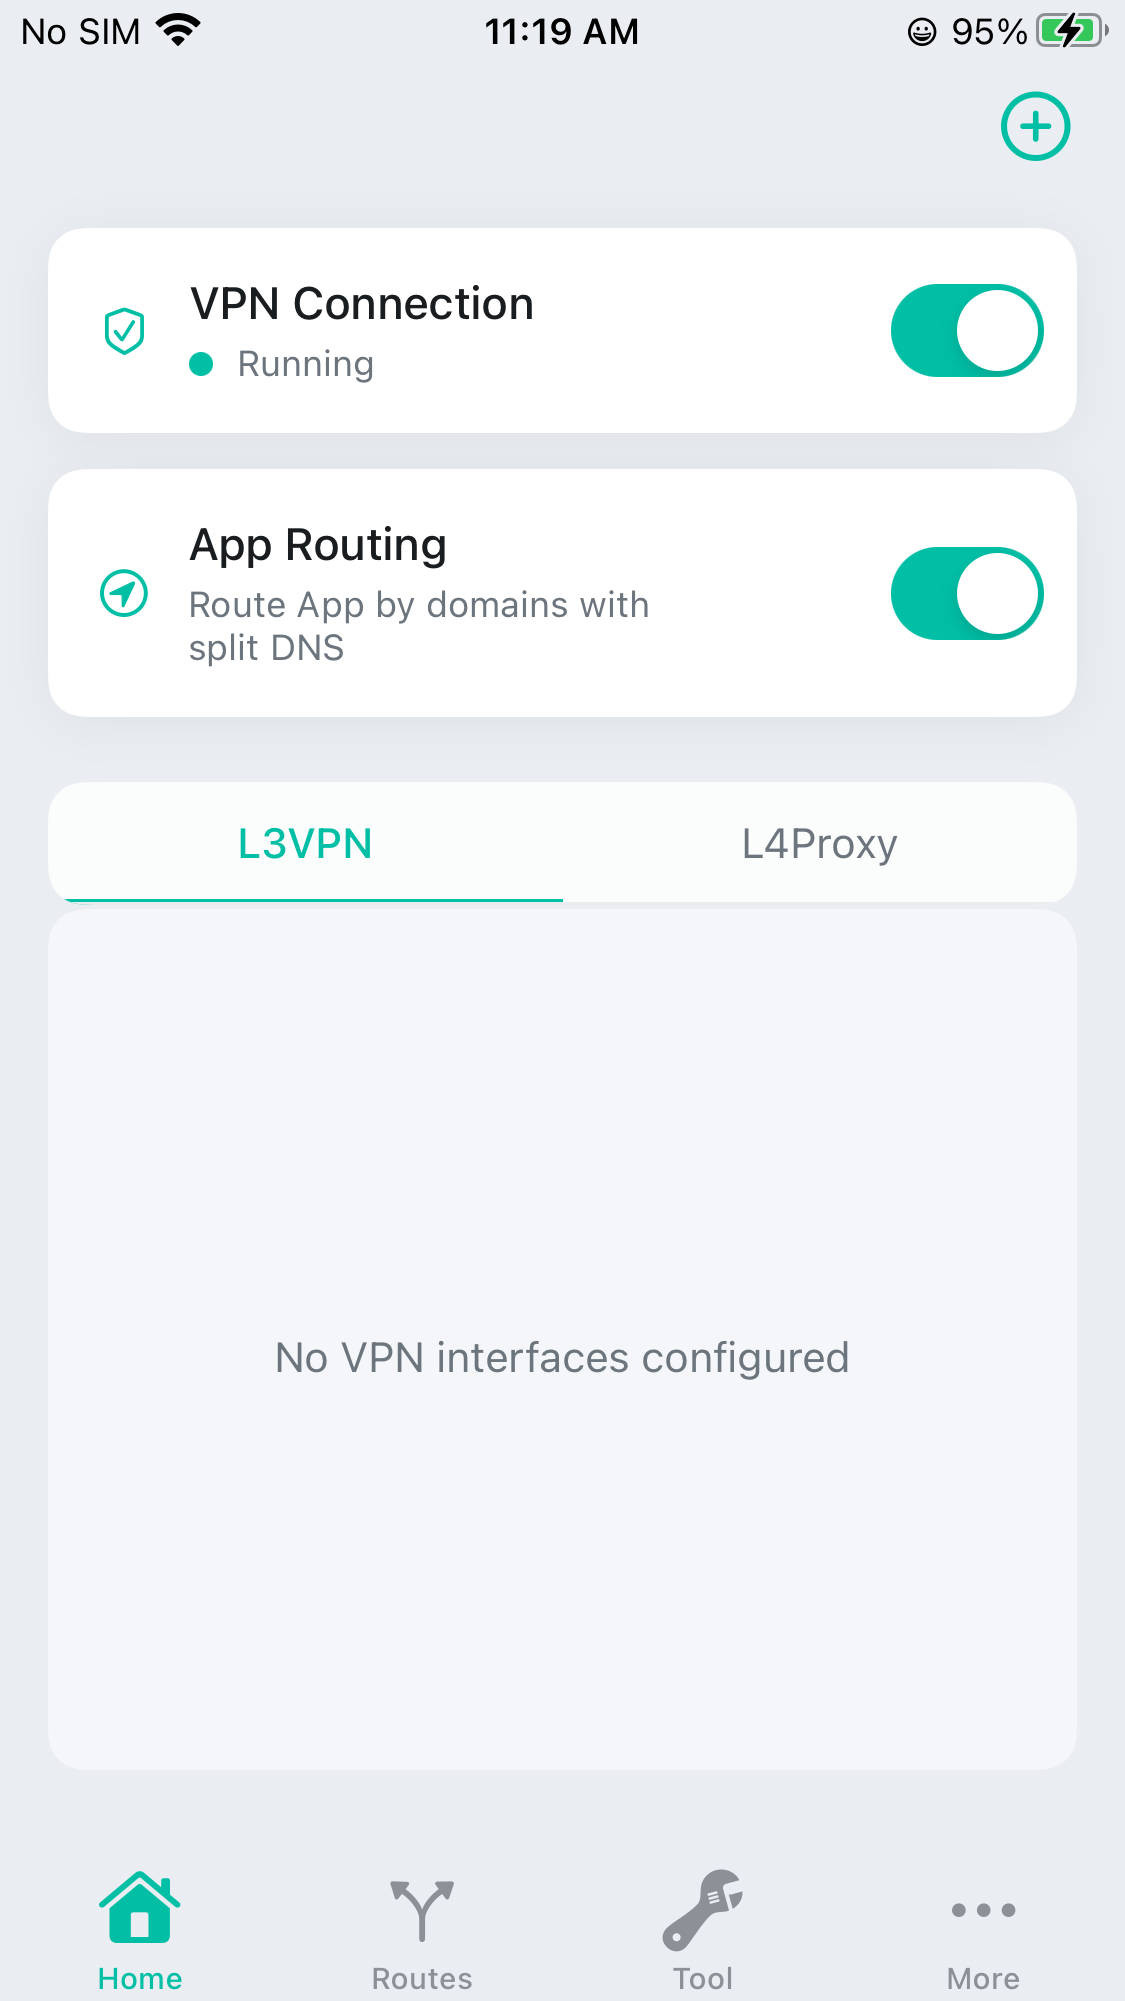
Enable App Routing
Just toggle the App routing switch.
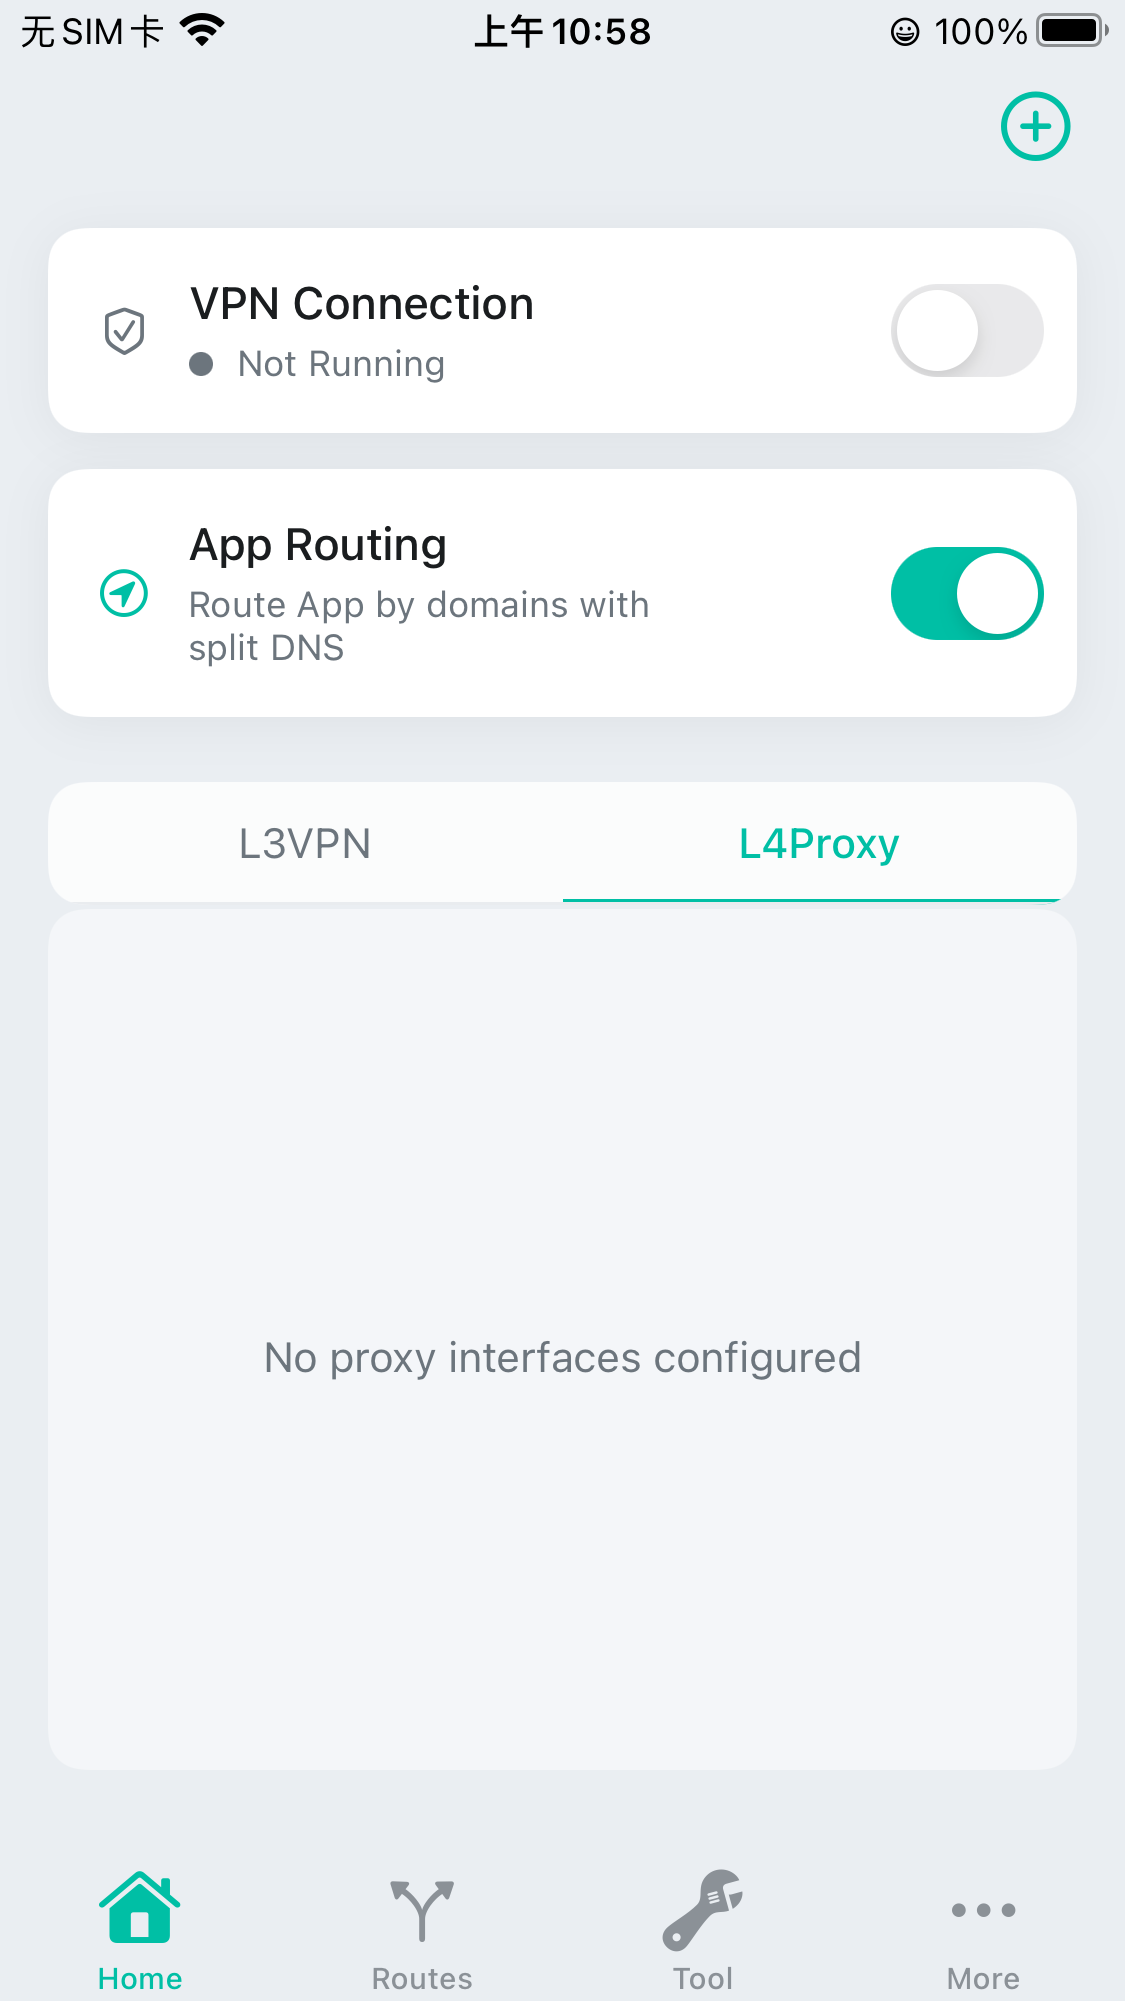
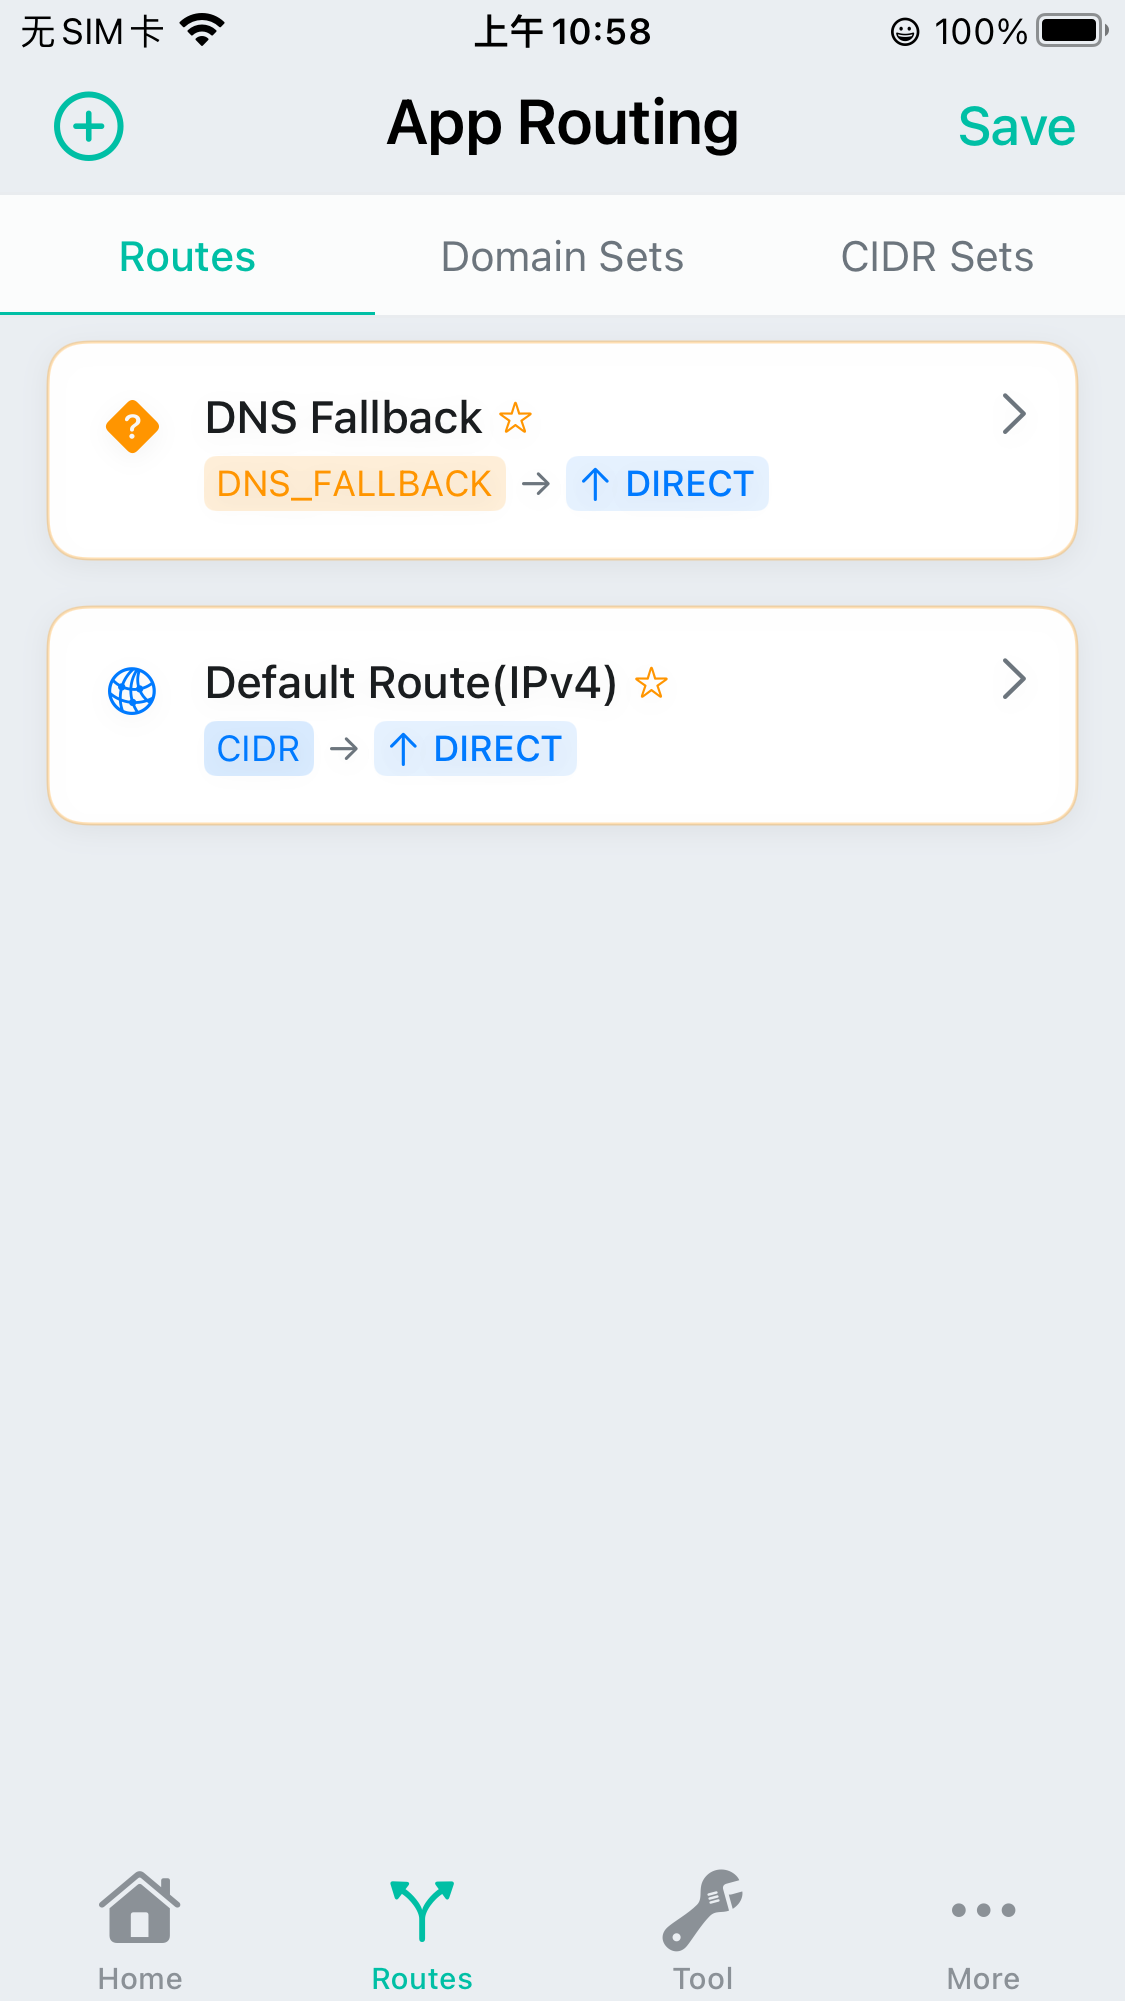
Add Routes
When you first install the app and goto the Routes, it will alert you that two required routes is needed to add, you can just click it the add it.
For HTTP live capture case, you just need to keep it’s default action to DIRECT which means all the traffic will be sent to the local Internet after the App process it.
Please note you need to hit the top right Save button to save the routes.
The DNS Fallback route is used to decide which DNS server the internal DNS server of the App will use when process DNS requests from the system.
The Default Route(IPv4) route is used to send all the traffic if you do not configure any specific CIDR/CIDR set routes.
Here is the example snapshot of the saved routes:
Enable HTTP Processing
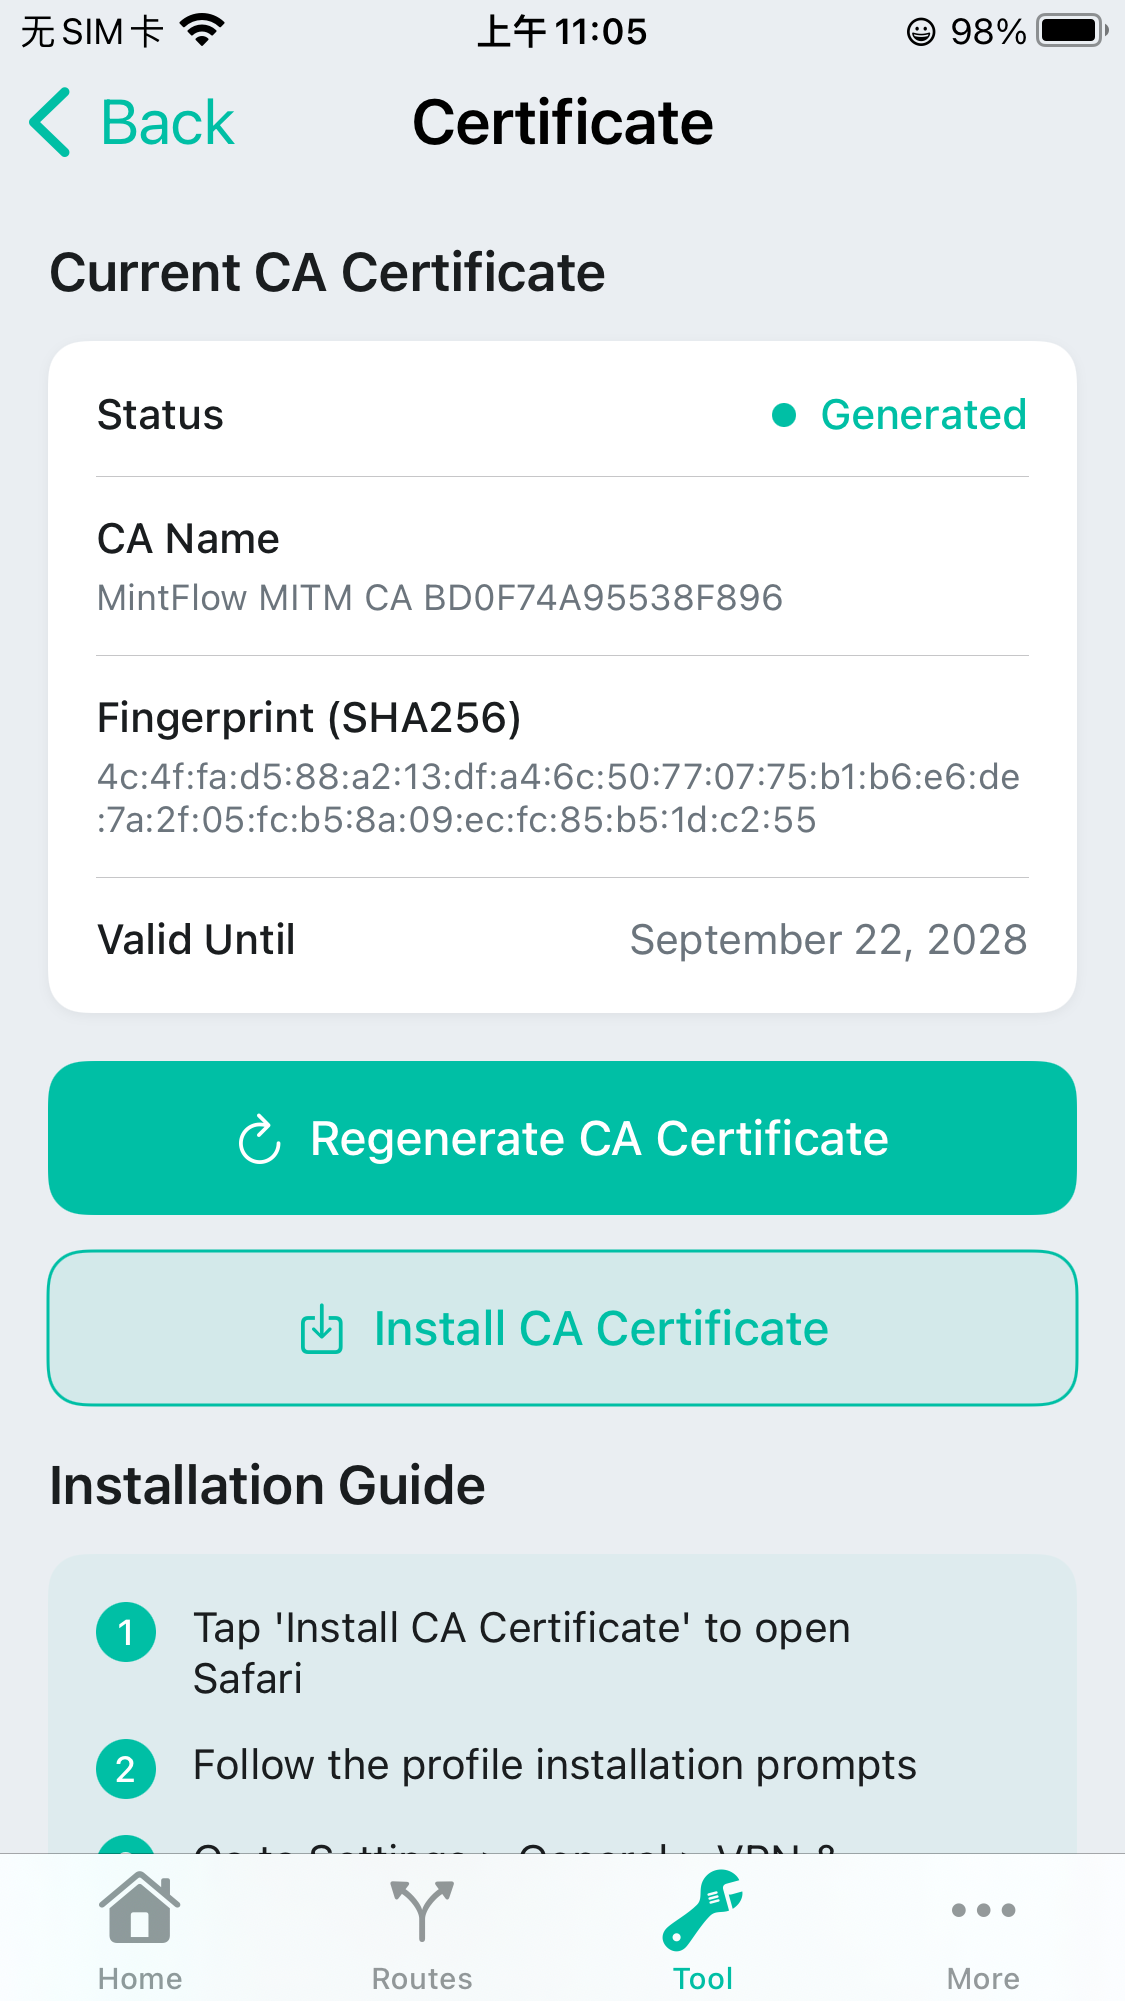
Since most of the HTTP traffic is HTTPS nowadays, you need to generate a CA and install&trust it in order to let the App to decrypt it.
Generate CA, install & trust
Generate CA
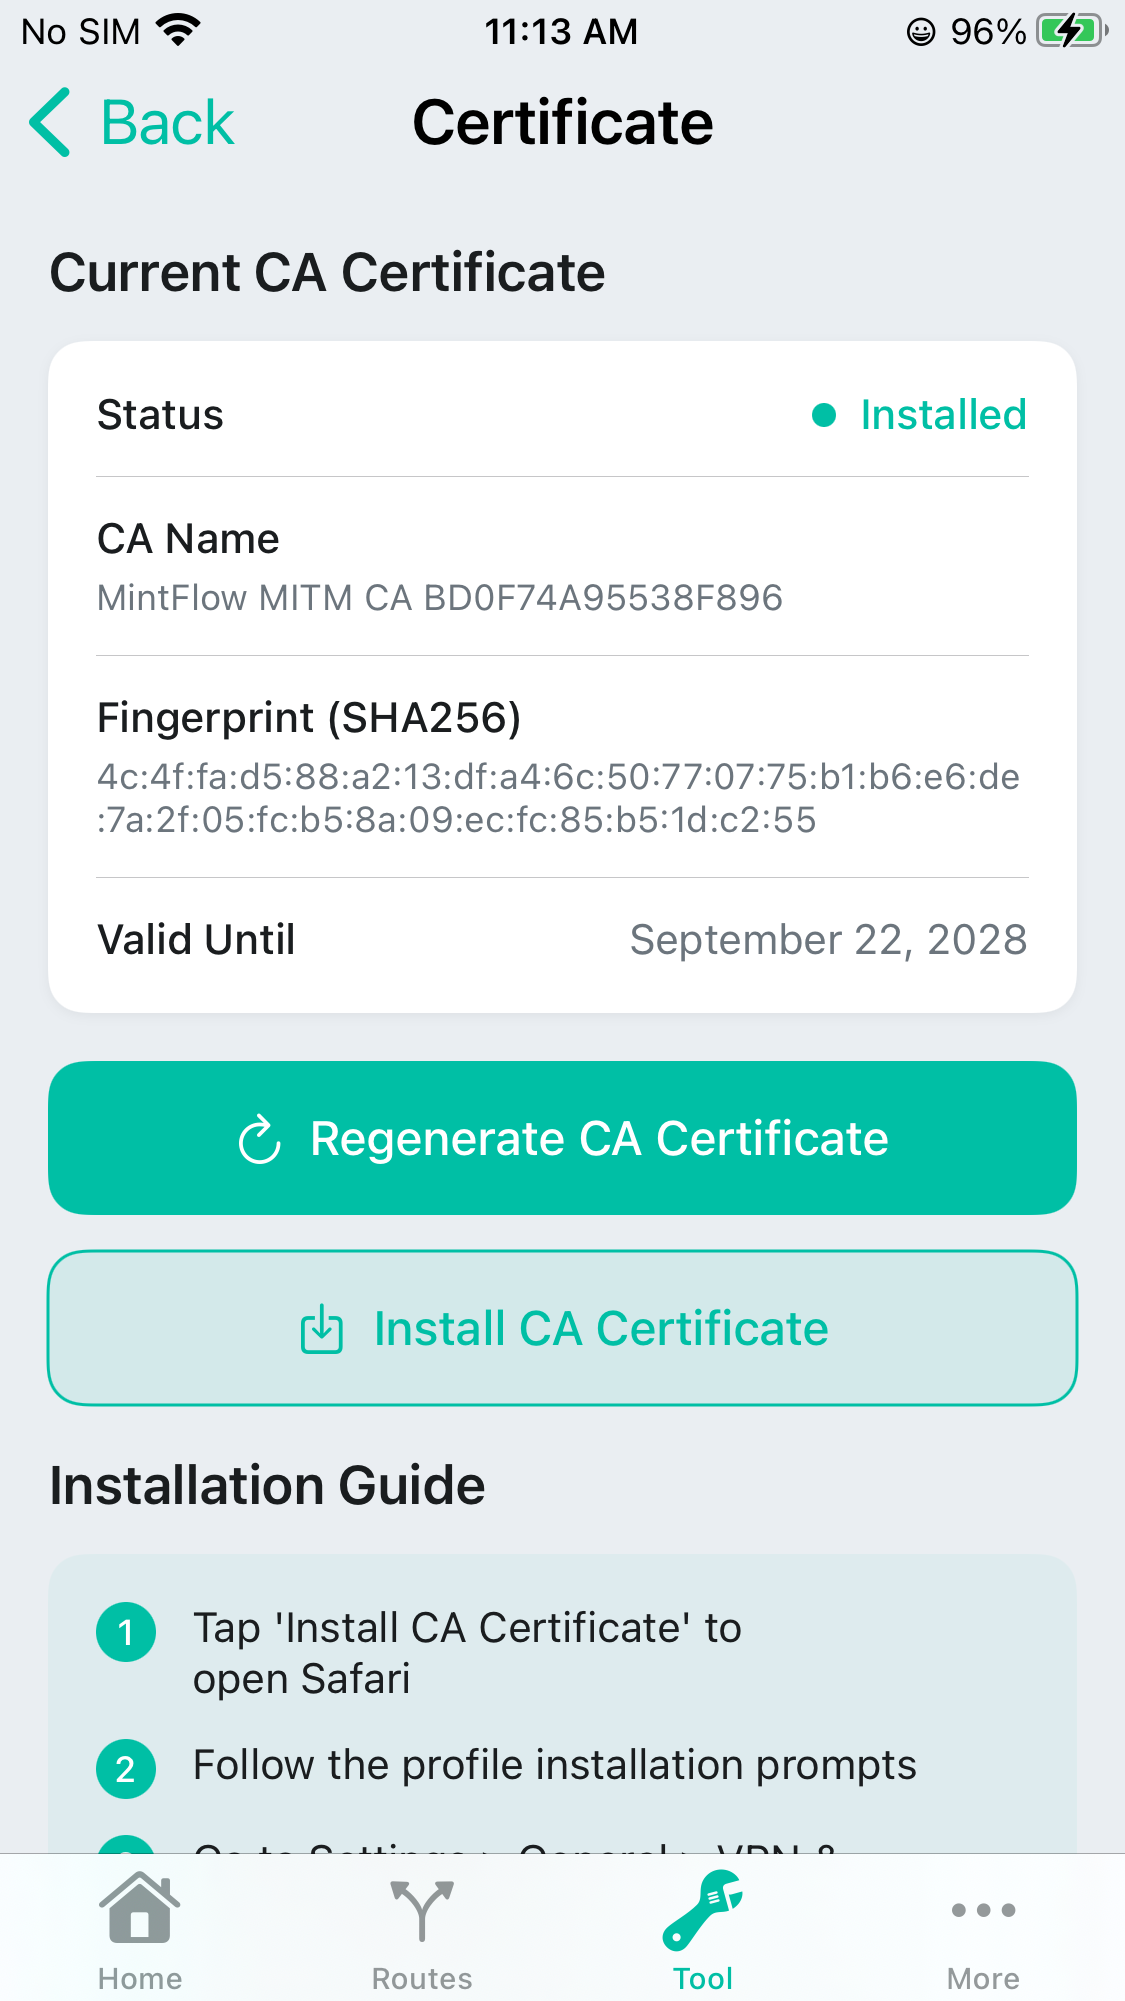
You can just click the Regenerate CA Certificate to create a new localy saved CA.
As you can see from the status below, the Current CA Certificate is generated, in the following step it will refresh automatically to help you to know the CA state.
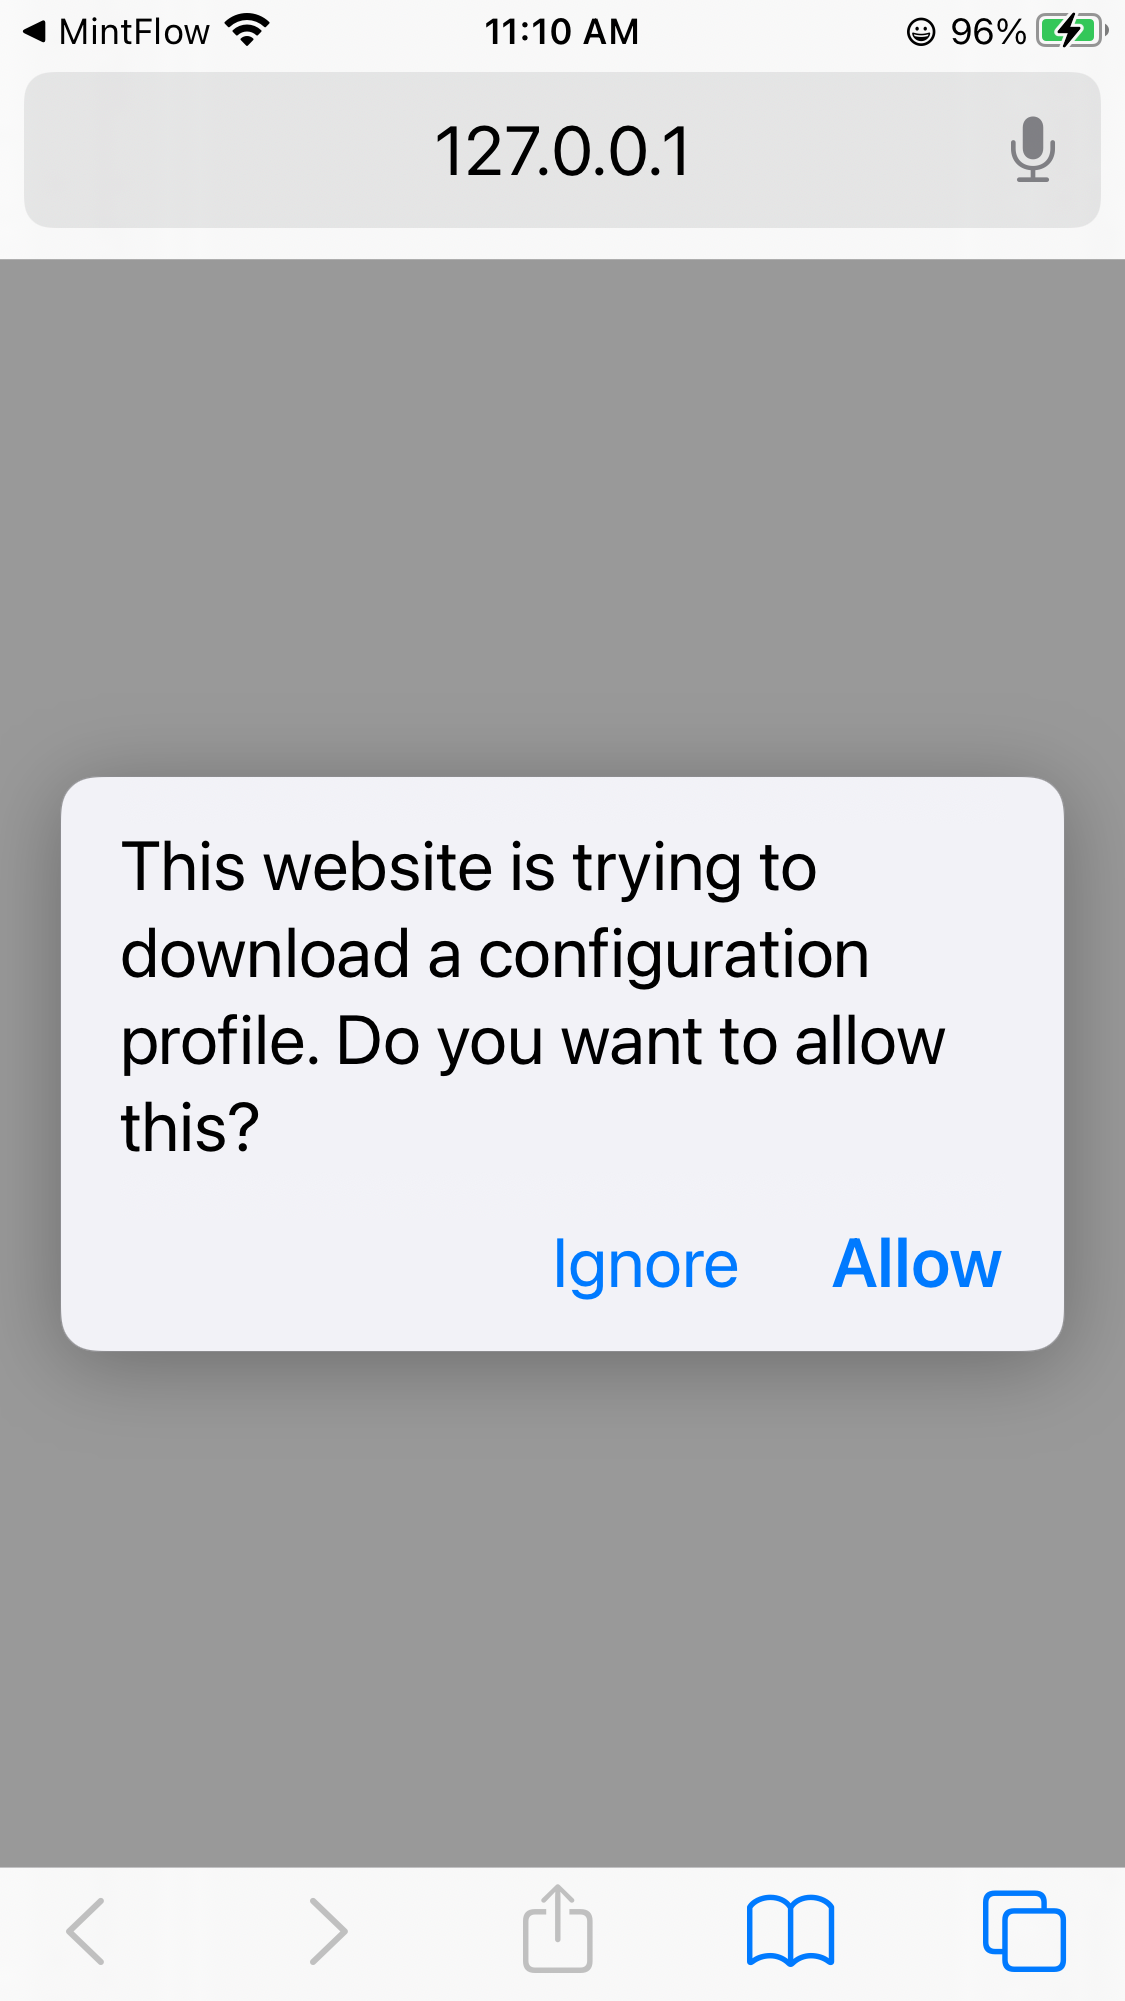
Download CA
You can just click the Install CA Certificate to download the CA profile from the embedded HTTP Server using web browser.
NOTE:
If the browser does not give the above prompt, please go back to the App and click the Install CA Certificate Again.
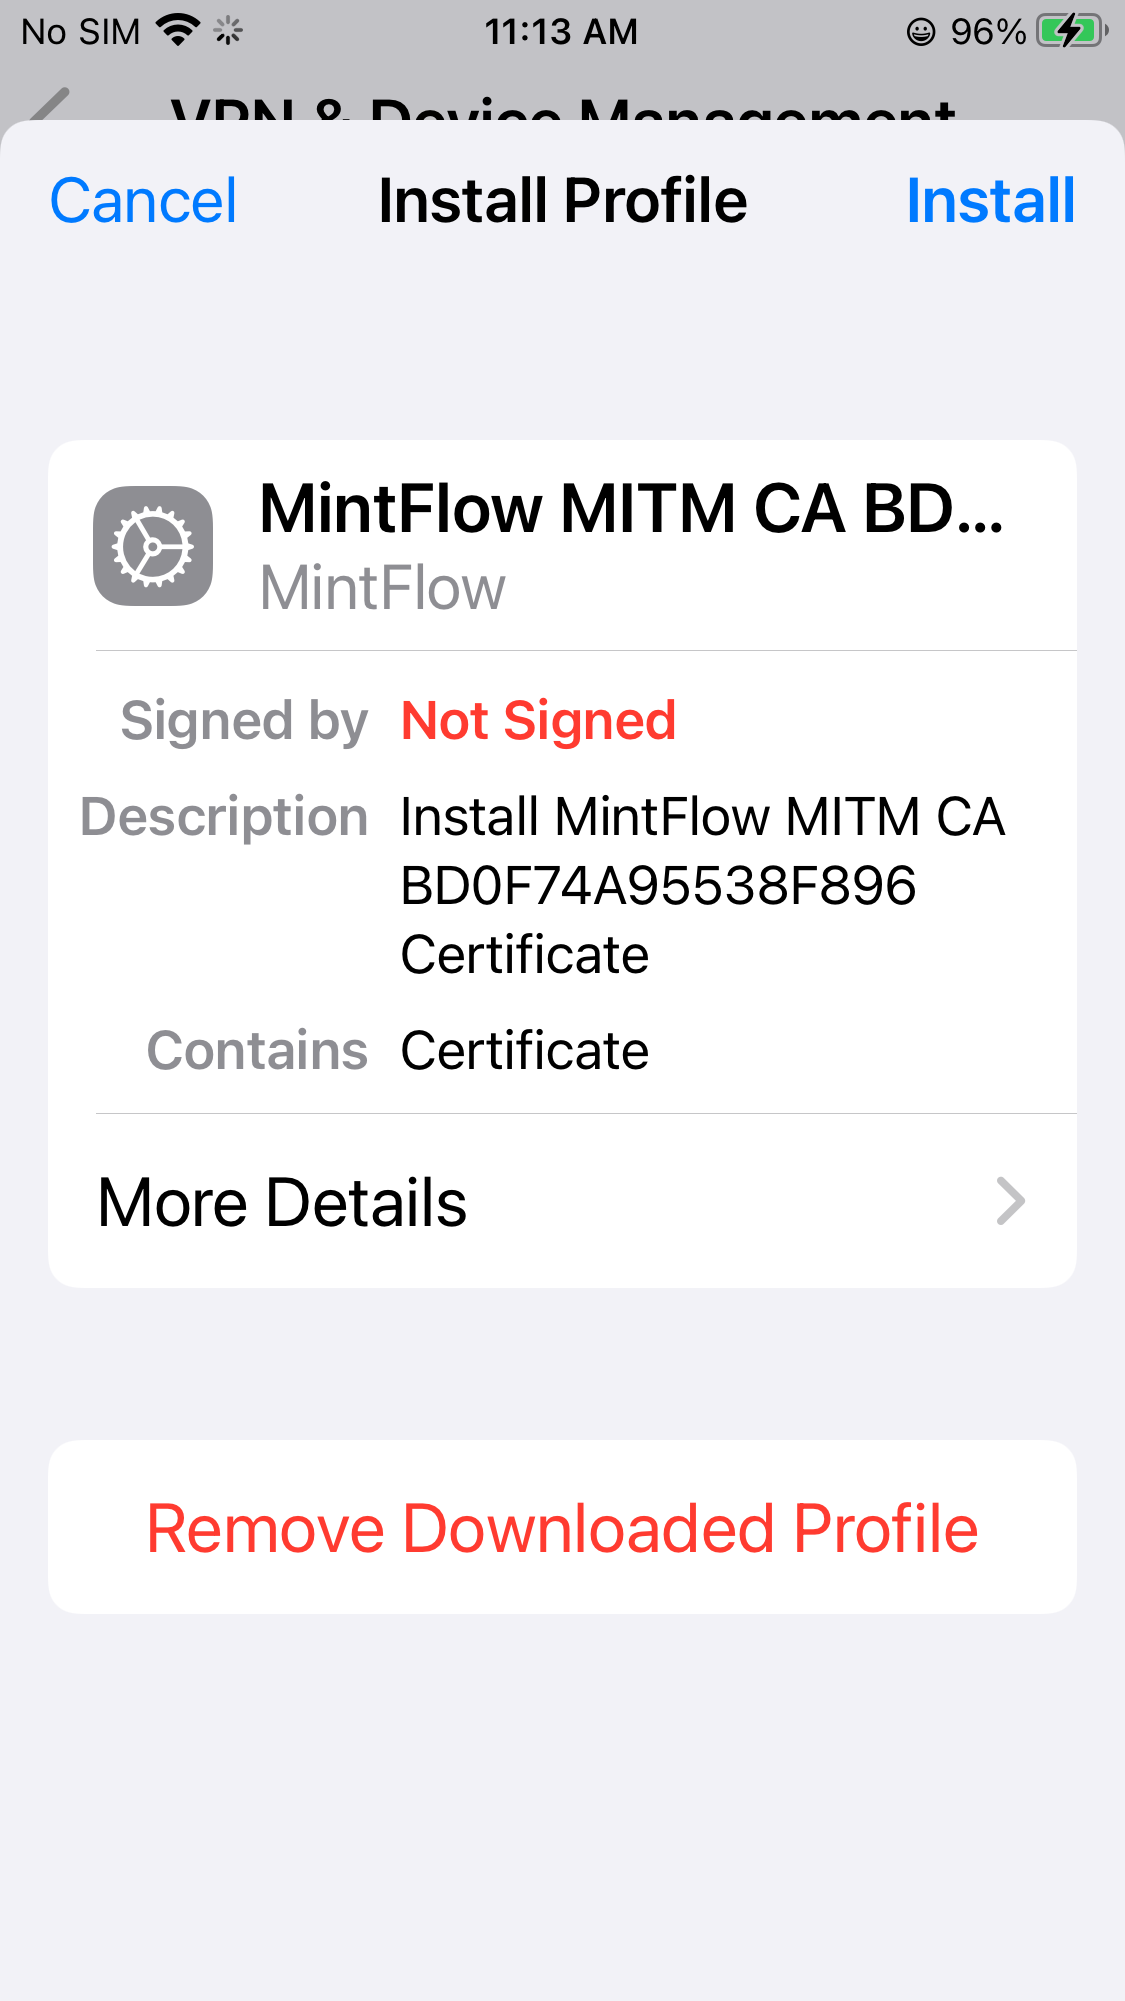
Install CA
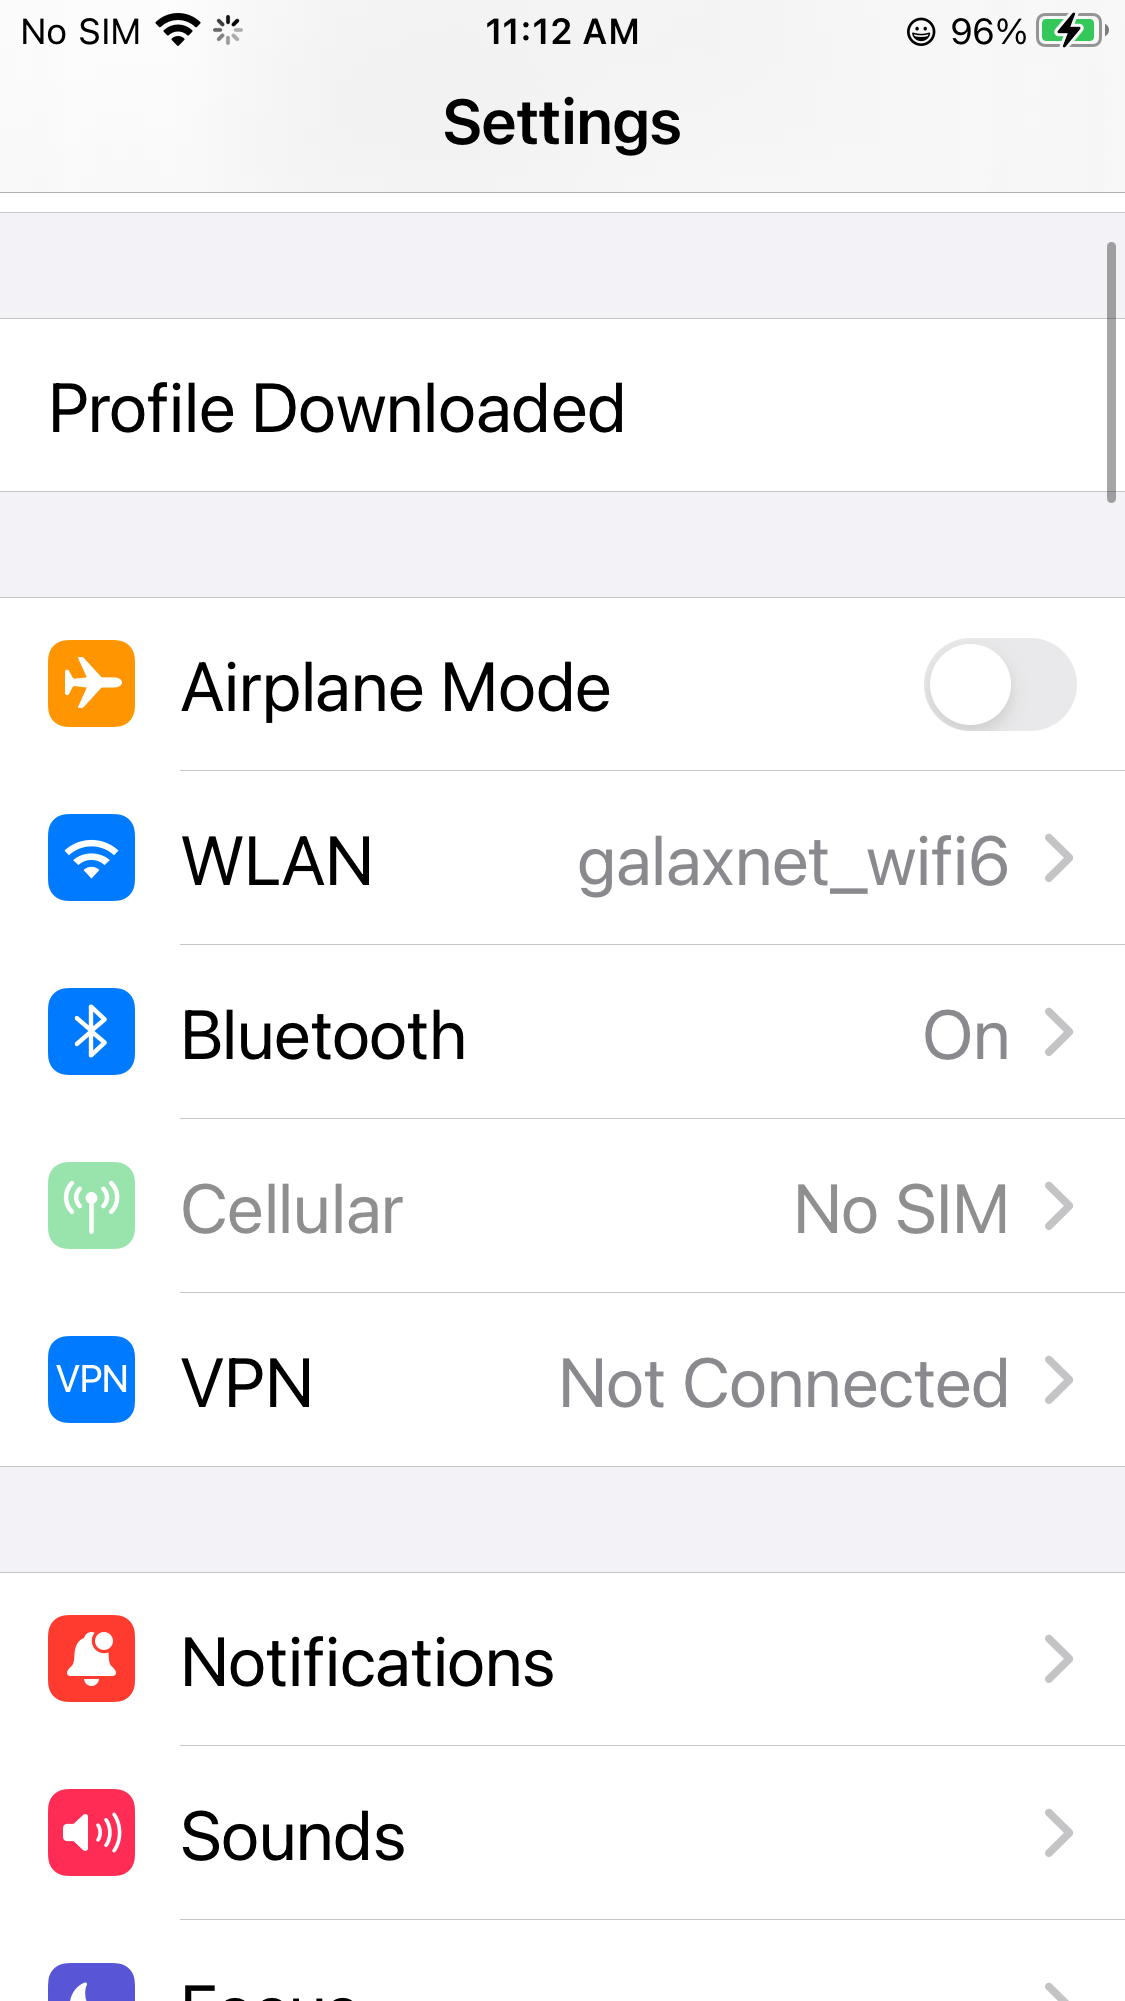
After the CA profile is downloaded, you can just goto the settings and see the downloaded profile, click Profile Downloaded and install it.
After you install the profile, you can switch back to the App and see it’s now shown in Installed state.
Trust CA
After the CA profile is installed, you can just goto the system General/About/Certificate Trust Settings to trust it.
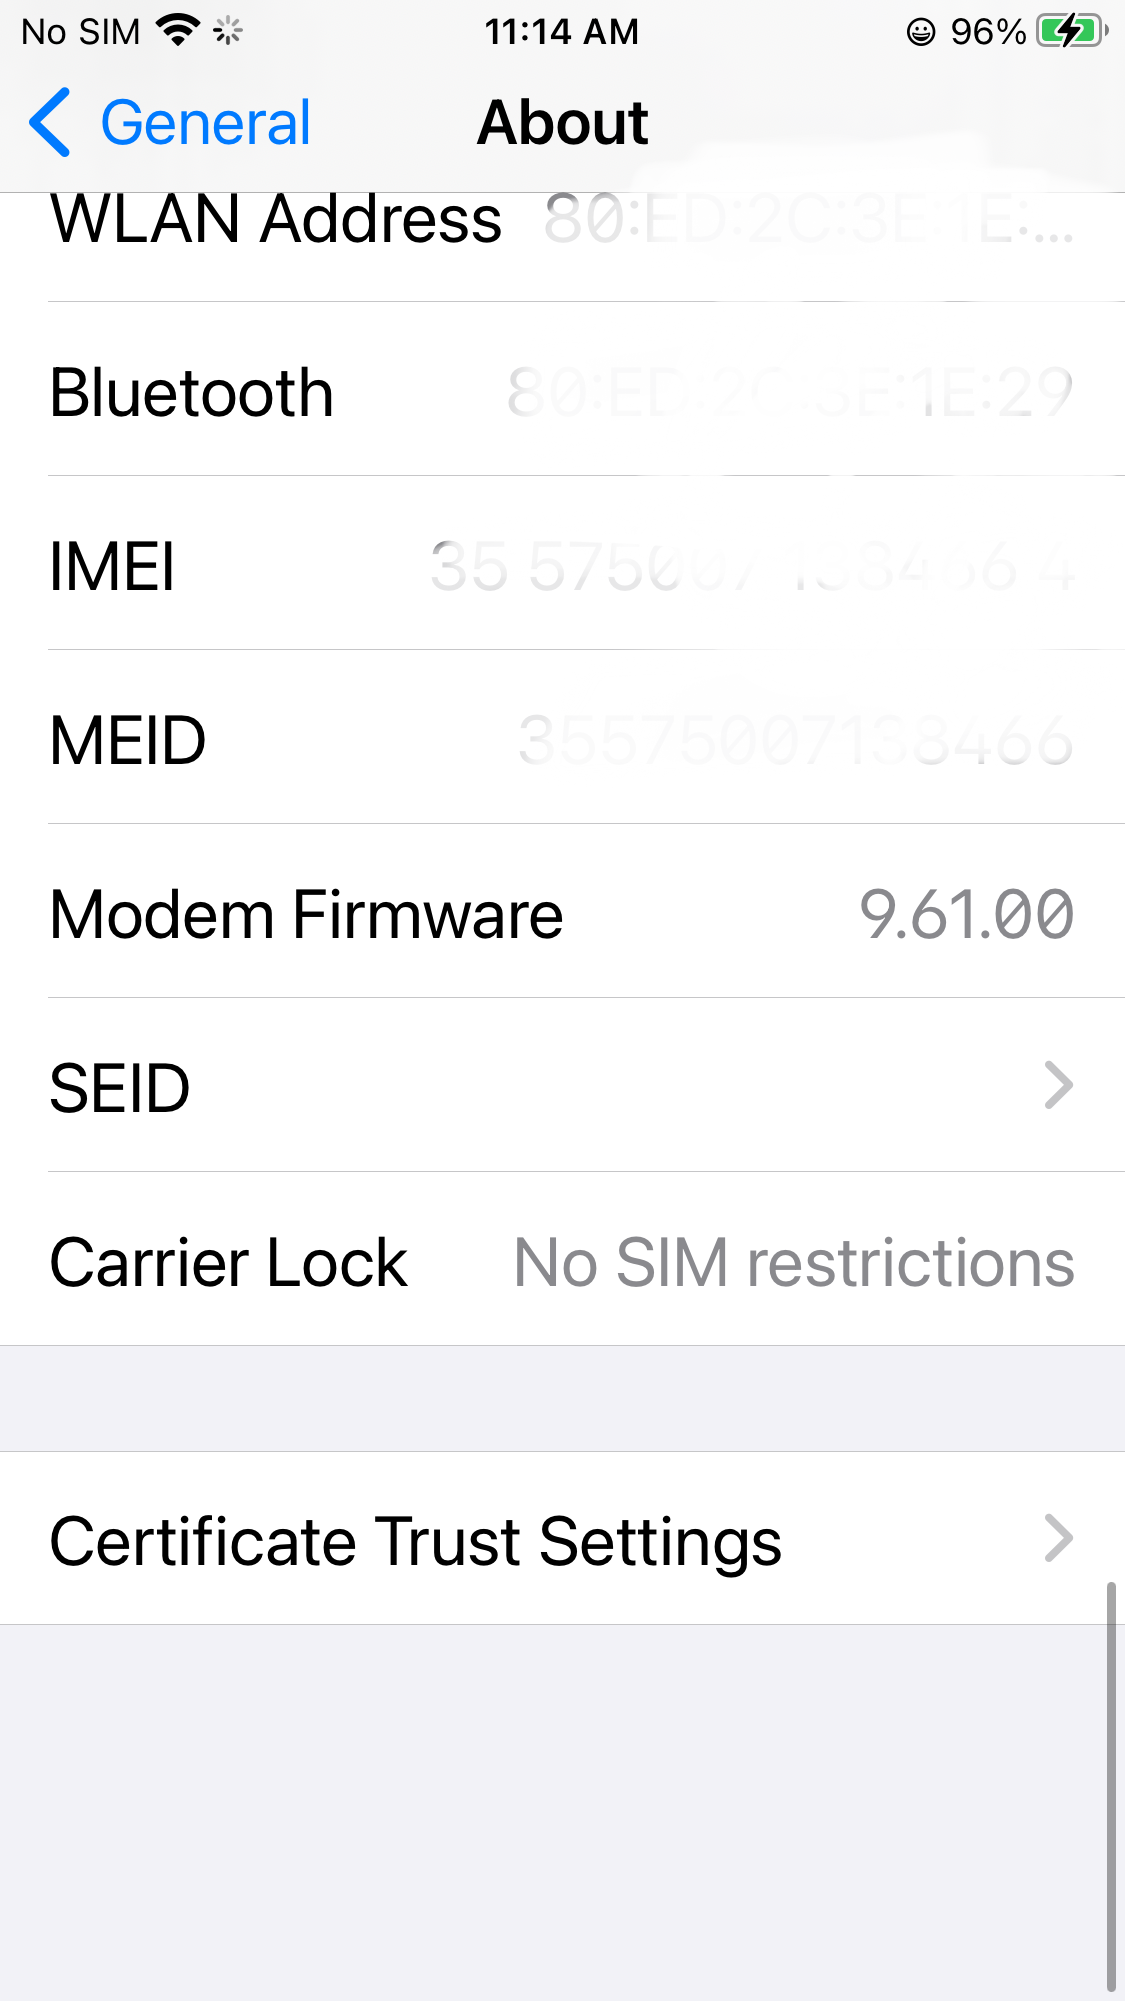
Enable Trust as following:

After the CA is trusted, you can switch back to the App and see it’s now shown in Trusted state.

Add Interested Domains
Now you can just add some domain suffixes that you want to capture it’s traffic, now matter it’s HTTP or HTTPS.
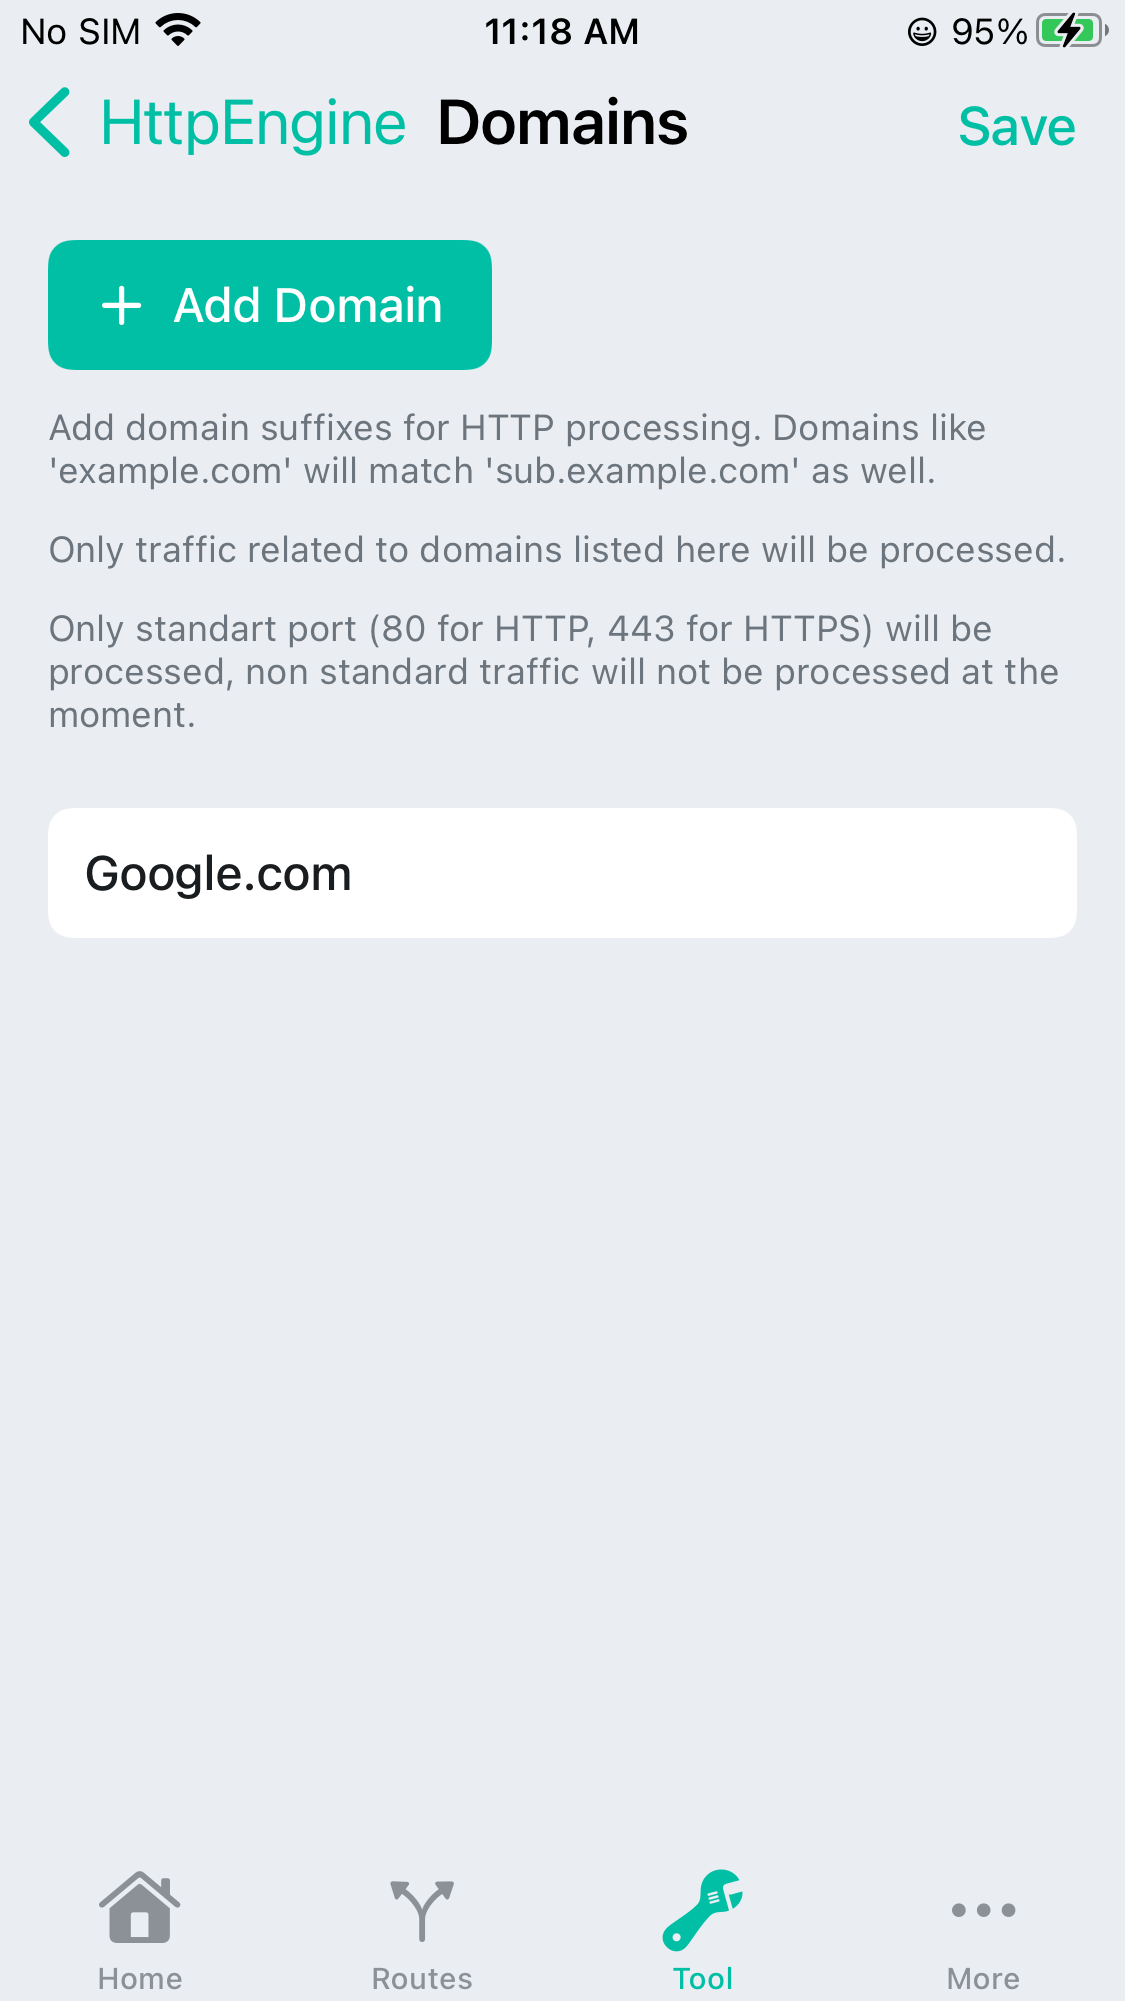
Only domains listed here will be processed.
NOTE:
Some App use certificate pinning technology, thus it will not trust the CA even we do that in the system, currently there is no way to capture the HTTPS traffic from such App.
Enable VPN
Now you can just enable VPN to route all traffic from your system to the App.
Do Live HTTP Capture
When MintFlow NetStack VPN is running, you can just start capture the HTTP/HTTPS traffic belong to the domains you just added.
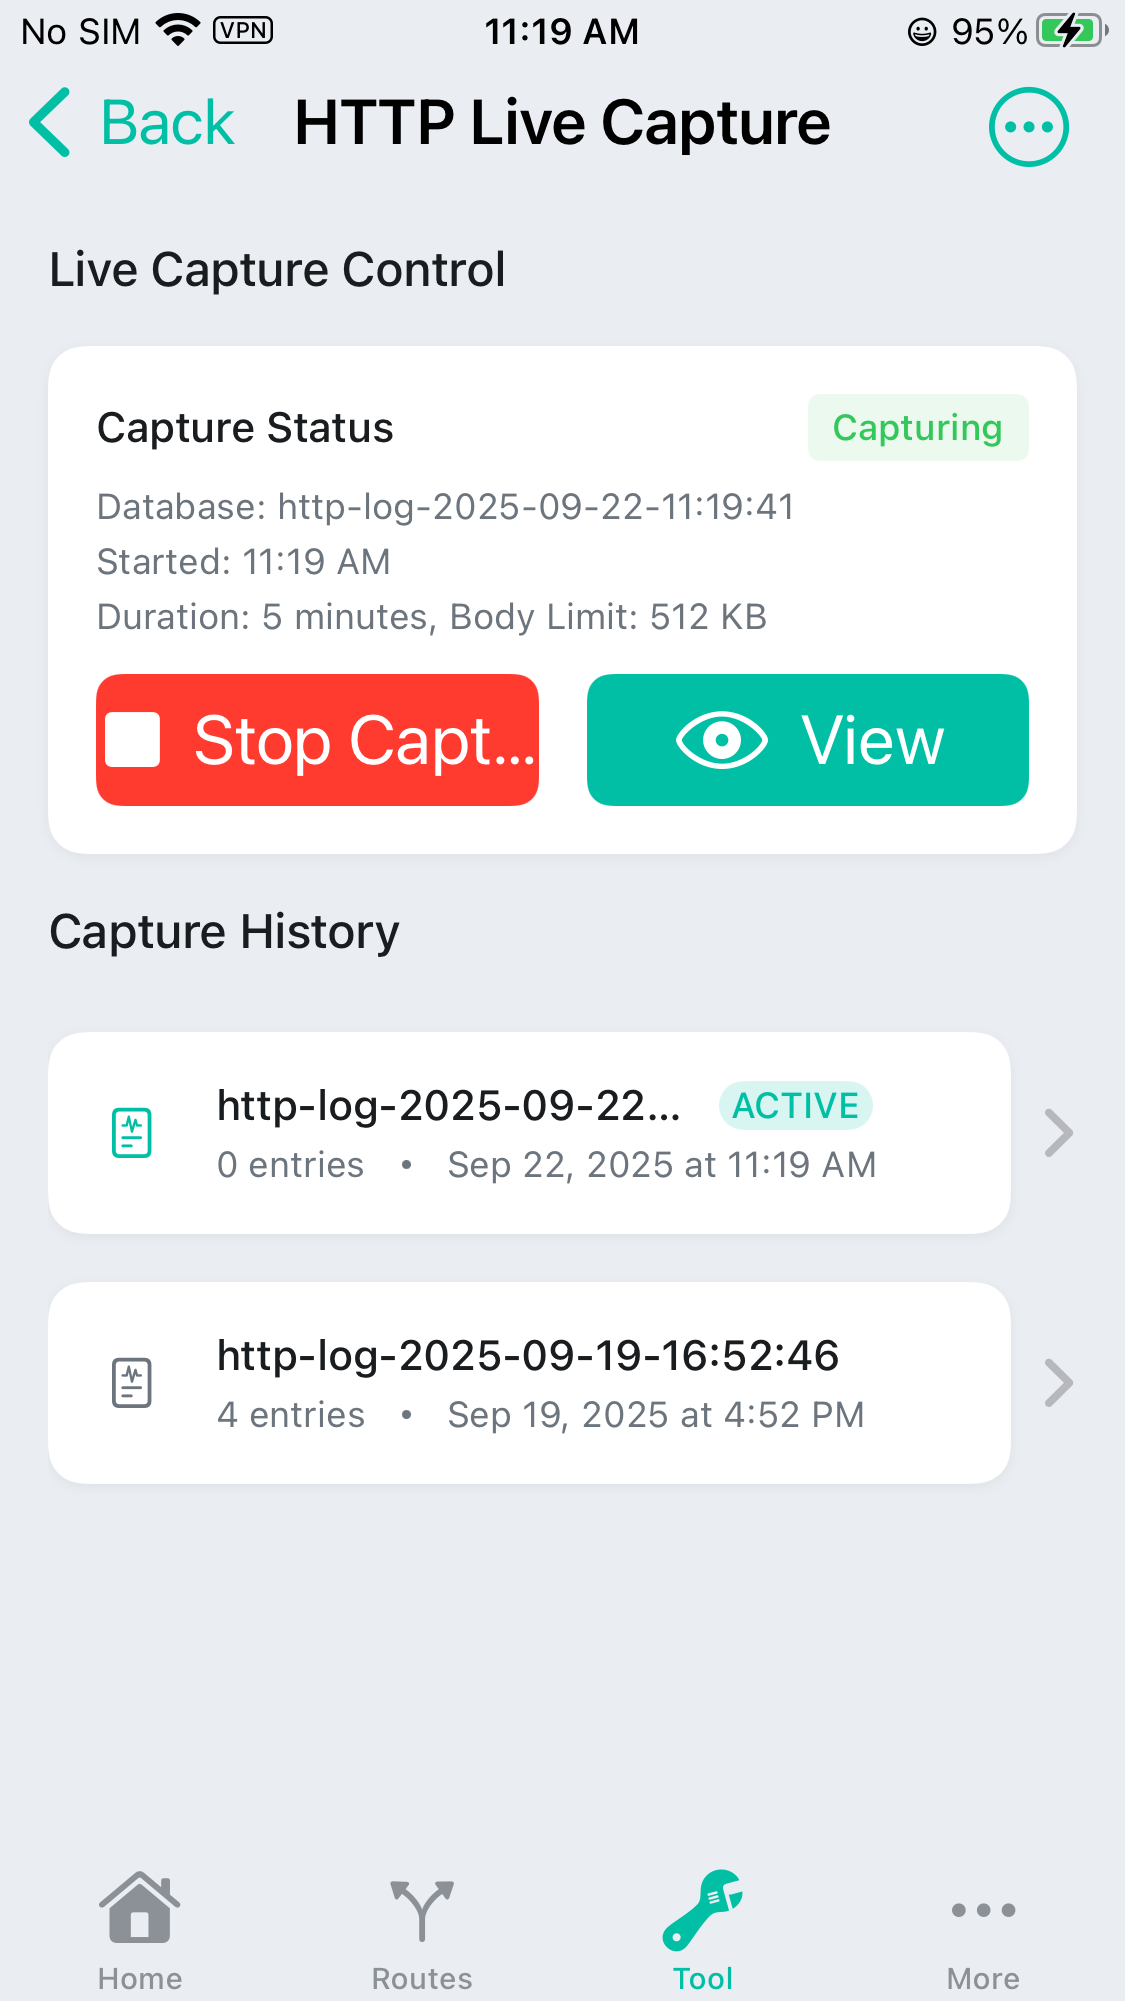
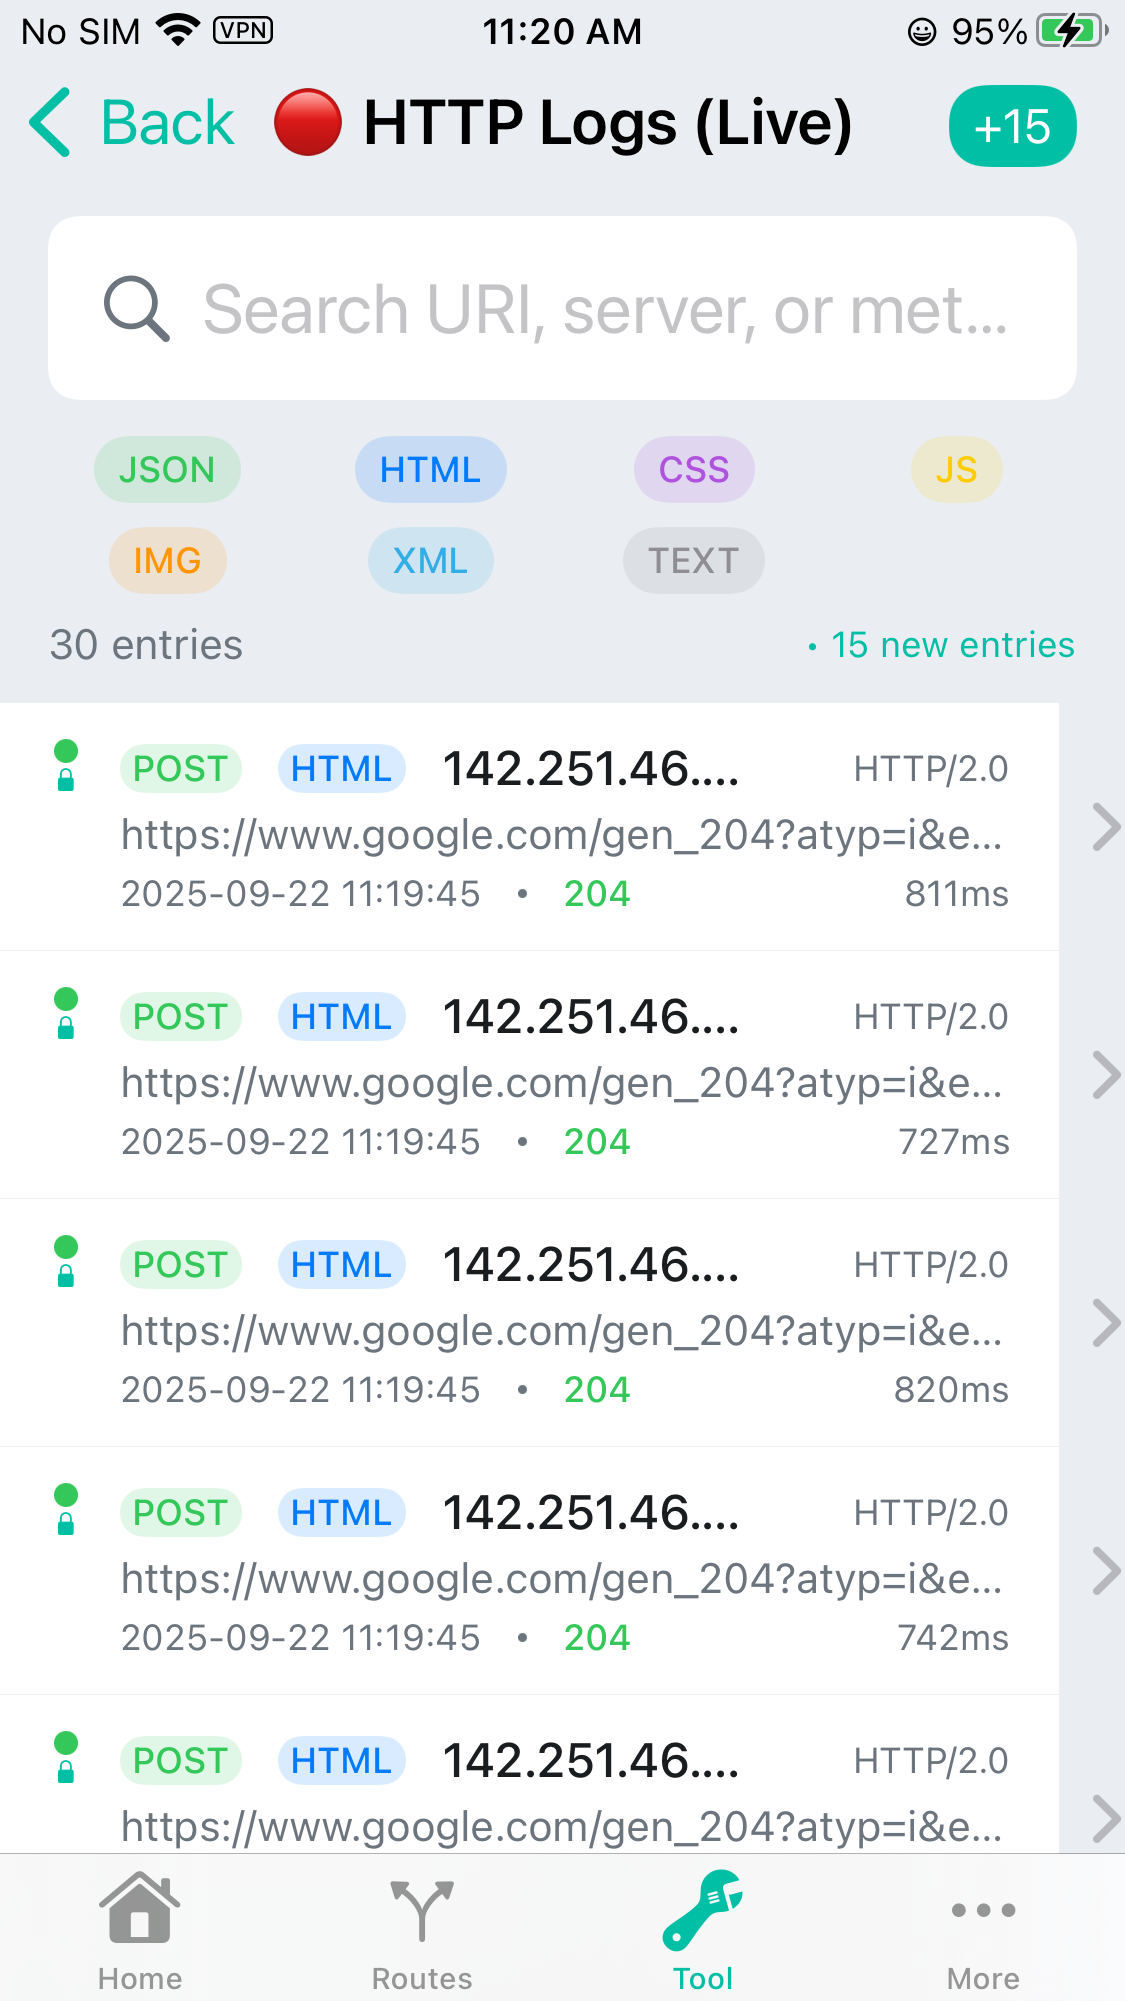
Here is what you may captured, and you can go each req/resp and view it’s detail information:
Future Tasks
Here is some future tasks you may needed to better use the App:
-
Use DNS activity/DNS logs to check Domains related a specific App
you can do this by start/stop a specific App multiple times to check domains related to it, then you can add the domain suffixes to the Http Process Domain list to capture it’s traffic.